There are ways to upload more than one candidate through Springboard. First you’ll need to have permission to access this feature. Check with your Site Admin if you don’t see it in the menu.
-
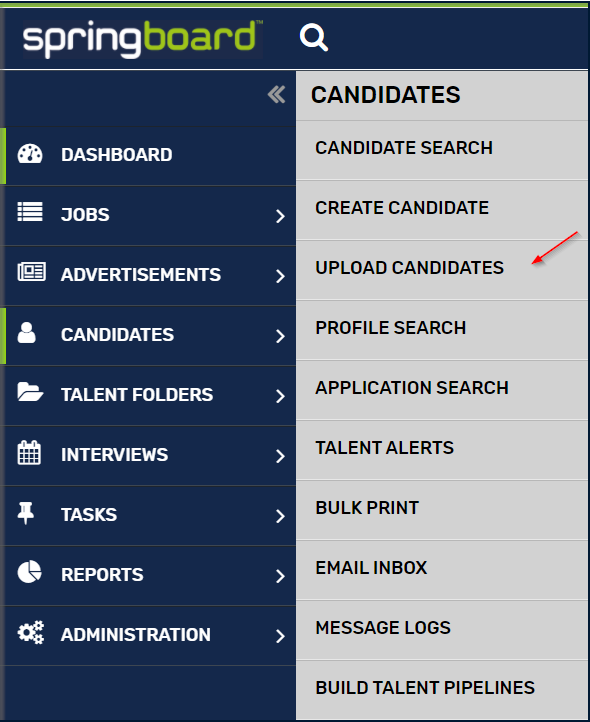
Navigate to Candidates → Upload Candidates.
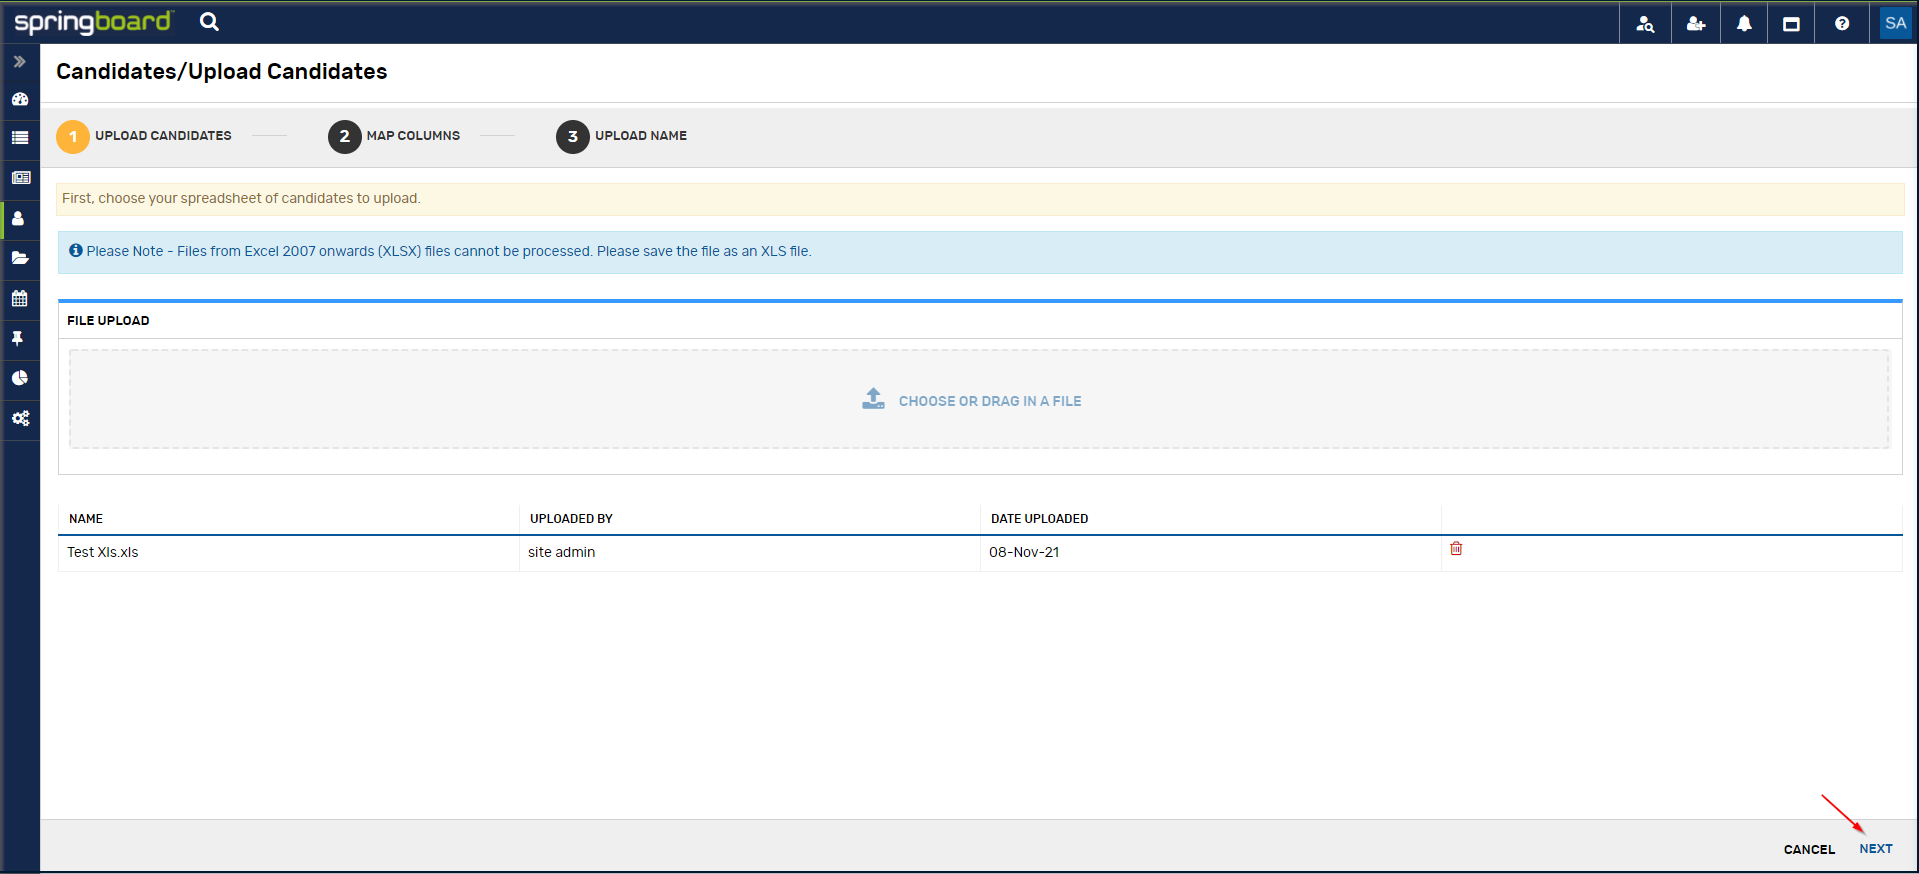
2. In the Candidates/Upload candidates page, Choose or Drag and Drop your XLS file in the File upload area.
N.B. Files from Excel 2007 onwards (XLSX) files cannot be processed. Please save the file as an XLS file.
3. You’ll then see the file has been uploaded and ready to process. Click on ‘Next' at the bottom right of the page.
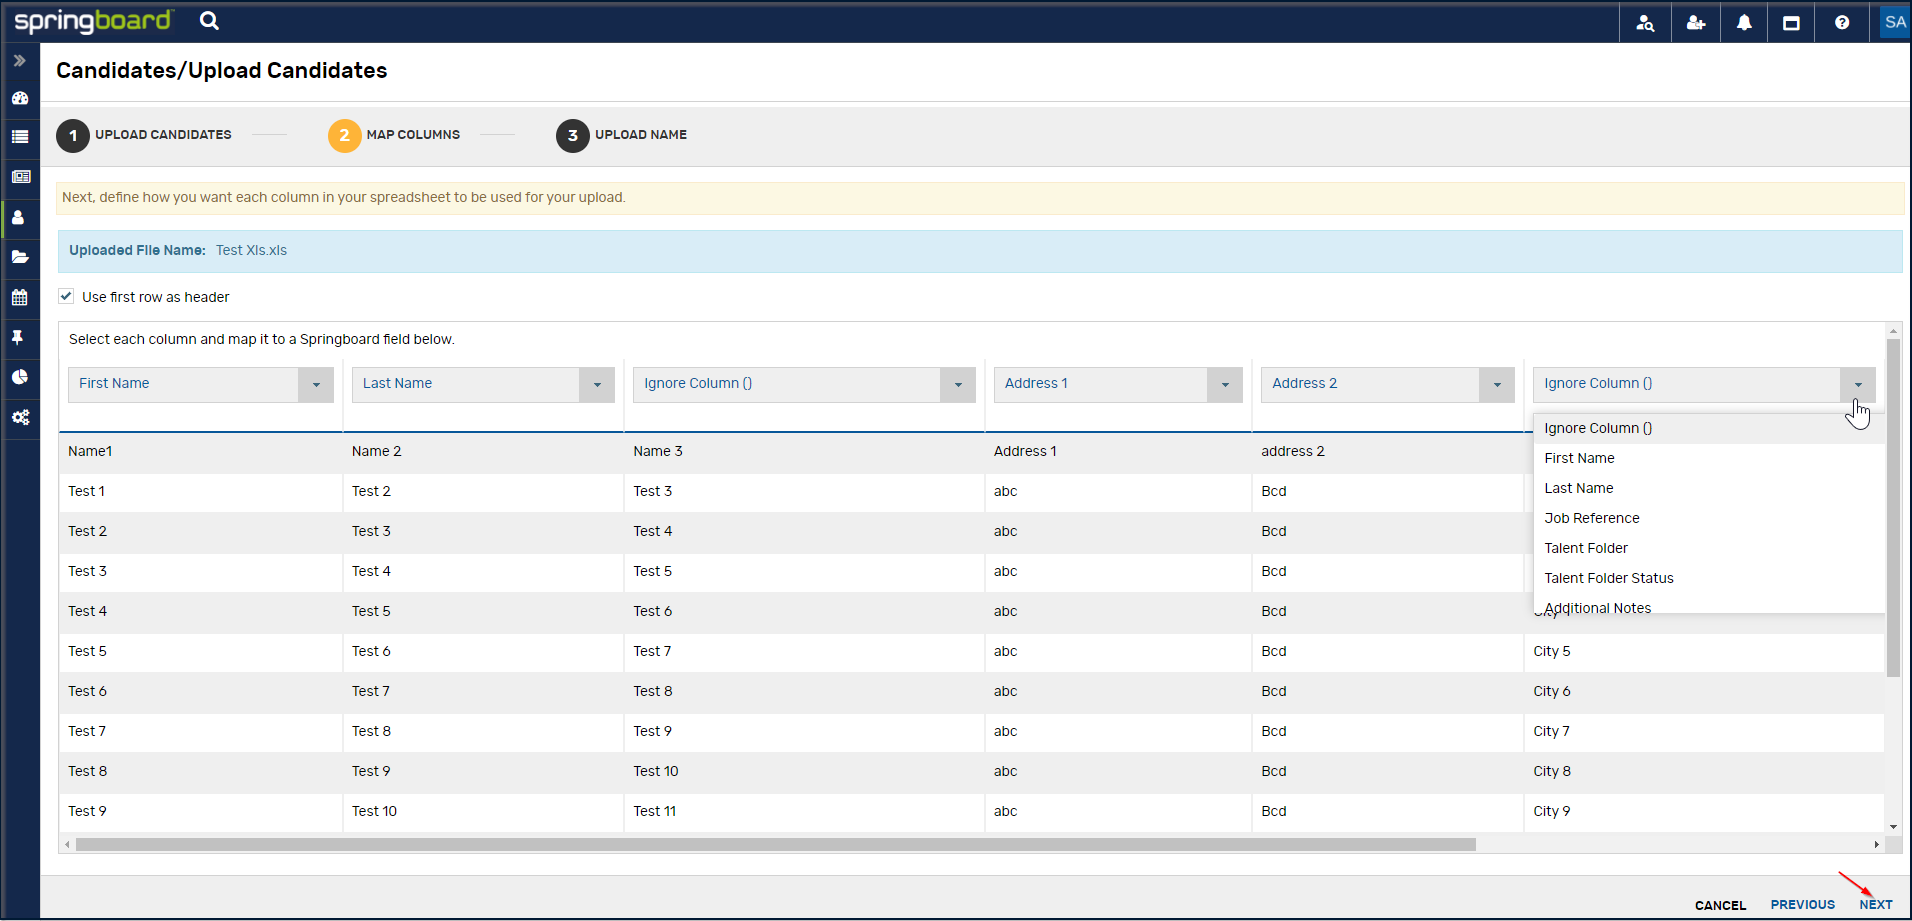
4. In the next screen, you’ll need to map the candidate details in the spreadsheet to fields available in Springboard. When done, click on 'Next.'
5. If there is a header row in the spreadsheet, make sure ‘Use first row as header’ is ticked.
6. The column dropdown option in the top of each row can be used to manually select a header name to match the Springboard field
N.B.2 - If you name the header row the same as the desired Springboard field, it should already be matched. E.g. Name the column in the .xls ‘First Name' To match to the Springboard field 'First Name.’
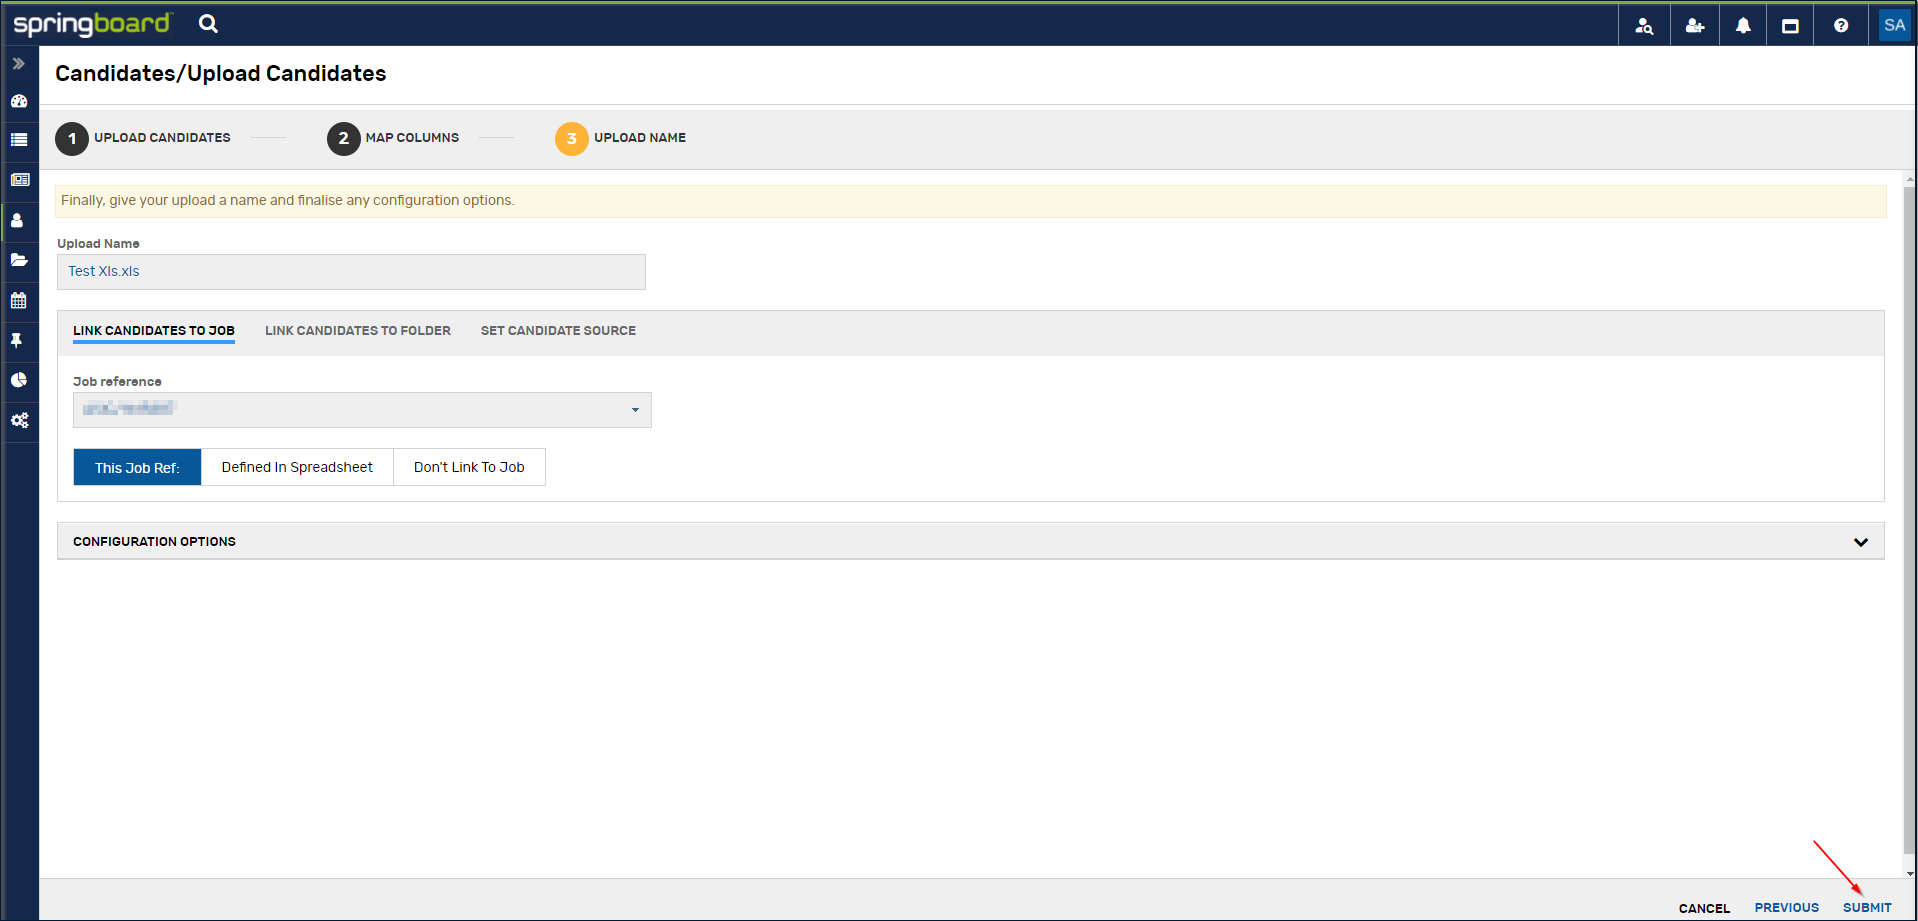
You can now link the candidates to a specific Job and/or a candidate folder.
Link Candidates to Job:
6. To manually link to a job, click on 'Job Reference' and choose the job. Click on ‘This Job Ref:’
7. If you wish to automatically link to a job, then you’ll need a column in your spreadsheet labelled ‘Job Reference.’ Populate this column with the desired Job Reference ID. Then choose 'Defined in Spreadsheet.'
8. If you don’t wish to link to a job, then leave on ‘Don’t Link To Job' or click on Link to Job
9. Click on "submit' on the bottom right of the page
Link Candidates to Folder:
1. To manually link candidates to a folder, you’ll need to select "Link Candidates to Folder'
2. Select the the Talent folder, then select the Candidate Status you want them to be in. Click on ‘This Folder:’
3. If you wish to automatically link to a Folder, then you’ll need a column in your spreadsheet labelled ‘Talent Folder.’ Populate this column with the desired Folder. Then choose 'Defined in Spreadsheet.'
4. The same goes for the Candidate Status. To automatically populate this field, you’ll need a column in your spreadsheet labelled ‘Talent Folder Status.’
5. If you don’t want to link a folder, leave on ‘Don’t Link to Folder.'
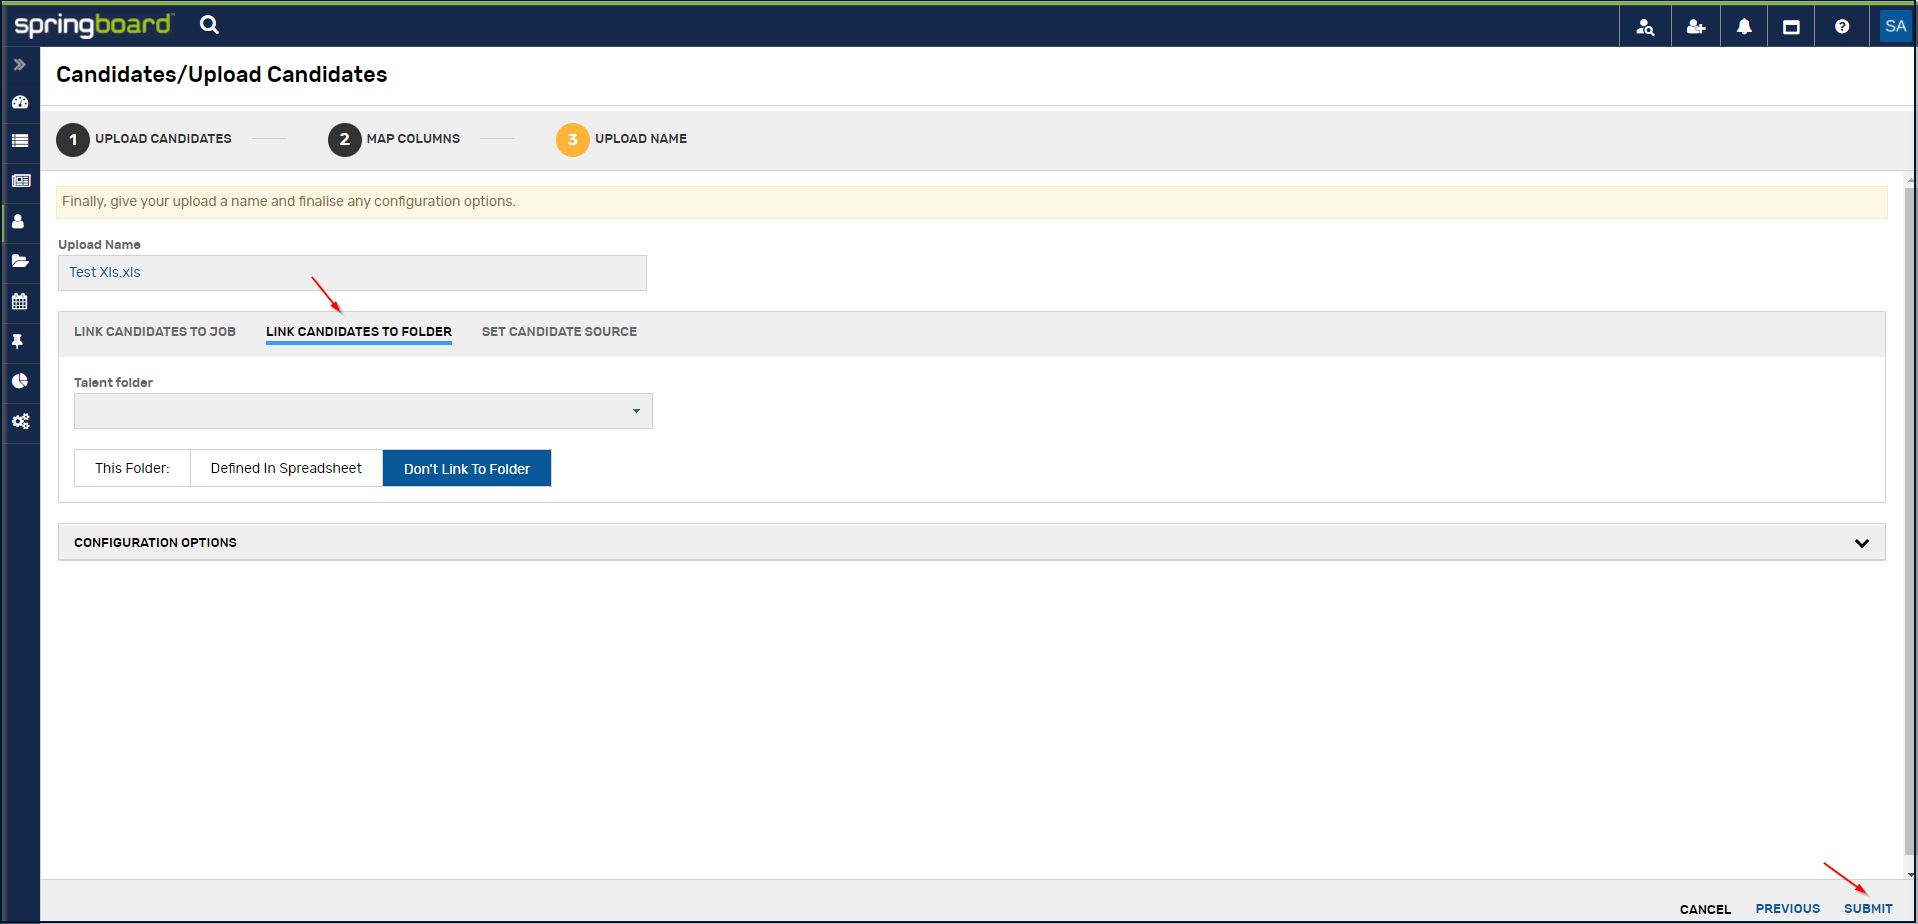
6.. You can select an upload name for the upload, so you’ll recognise it later.
7. Click on 'Submit' in the bottom right of the page once all the desired configurations are selected
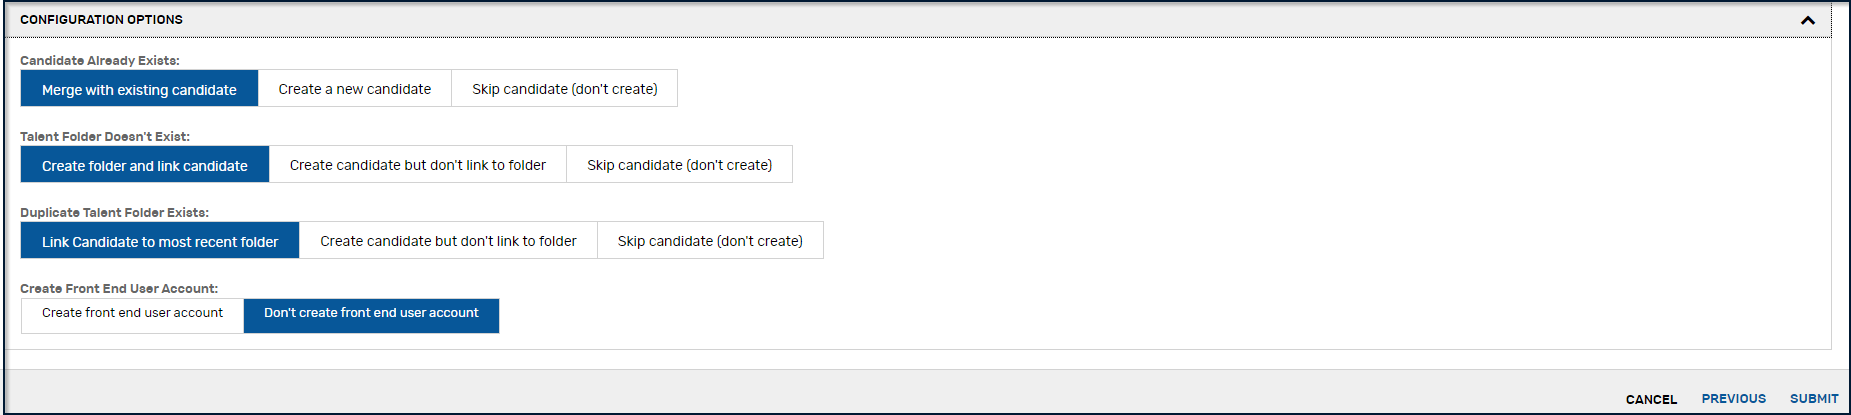
Configuration Options: (Available for both link to job and link to folder options.)
1. If candidate already exists, you can choose to merge with the existing candidate, create a new candidate or to skip creating the candidate.
2 If the Talent Folder doesn’t exist, you can create the folder and link to the candidate, create the candidate but don’t link to a folder, or skip creating the candidate.
3. If there already is a Talent Folder, you can create a new folder and link the candidate to the most recent one, create the candidate but don’t link to the folder, or skip creating a new folder.
4. You may wish to create a front end user account. (So the candidate can log into the careers portal.)